Summary
This tutorial aims to guide employees on how to create and interact with Freshdesk tickets directly through Microsoft Teams, covering both the creation of requests and the handling of tickets received from requesters, such as students and other MUST University users.
Through this integration, it is possible to:
- Quickly create tickets
- Receive notifications for new requests
- Respond to tickets directly in Teams
- Forward tickets and track information
However, some limitations should be considered:
- Not all created tickets are visible in the Teams chat, requiring tracking through Freshdesk
- File attachments are not supported in Teams
- Some important reporting fields (such as tags and type of support) are not available in Teams
- The agent signature must be added manually when responding
Therefore, Microsoft Teams should be used as a tool for agility in ticket handling, while Freshdesk remains the main platform for full ticket management, tracking, and data control.
Keywords & Tags
Freshdesk, Microsoft Teams, ticket creation, support, internal support.
Description
The integration between Microsoft Teams and Freshdesk allows employees to register requests and handle tickets in a centralized way, without the need to directly access the system portal. Through this integration, it is possible to interact with tickets opened by internal and external requesters, such as students, ensuring greater agility in service.
1. Locating Freshdesk in Teams
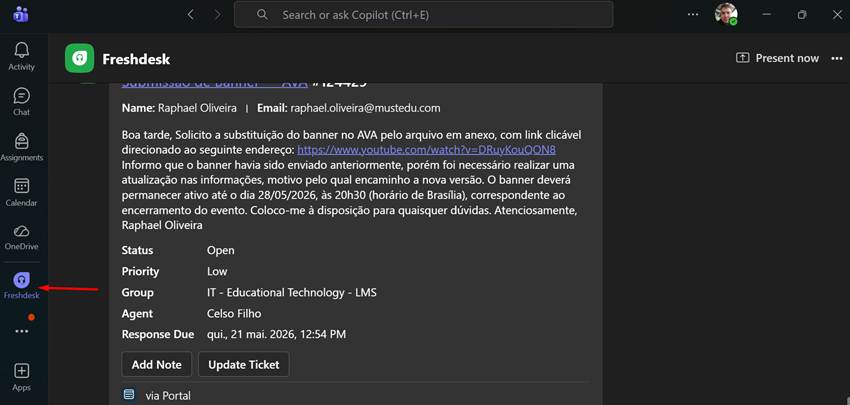
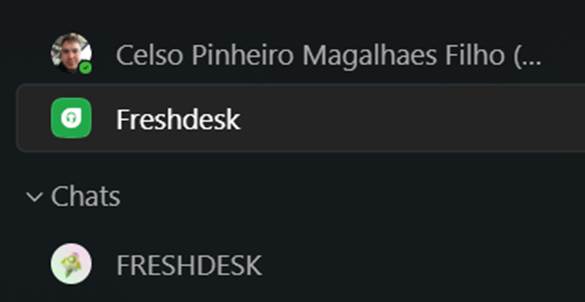
Freshdesk can be accessed directly within Microsoft Teams and is available on the left-side menu of the application, where it appears among the pinned apps. Additionally, it can also be found in the chat section, where the Freshdesk contact is available for interaction.
2. First Interaction with Freshdesk
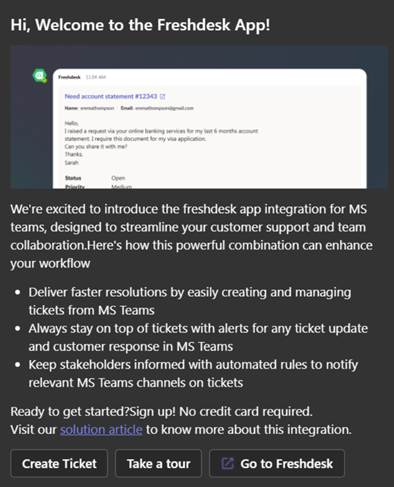
When accessing Freshdesk through Microsoft Teams, the employee will find an initial automatic message sent by the system, indicating that the channel is ready to receive requests. This message usually provides brief guidance on how to start the service process.
3. Ticket Creation
After the initial interaction with Freshdesk in Microsoft Teams, the employee can start creating a new ticket directly within the conversation. This can be done in two ways: through the option available next to the message box, where the ticket creation command usually appears, or by typing the instruction “Create Ticket” directly in the message field.
By using any of these options, the system will initiate the ticket creation flow, presenting the necessary steps to complete the required information and submit the request.
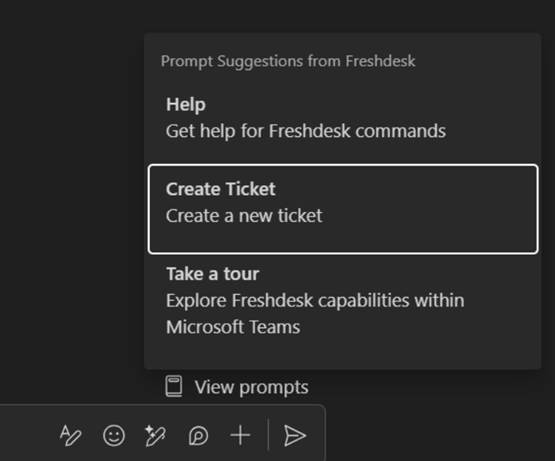
After performing one of these actions, Freshdesk will send a new automatic message in the conversation, indicating the start of the ticket creation process. In this message, the “Create Ticket” option will be displayed, which the employee must click to proceed with completing the request information.
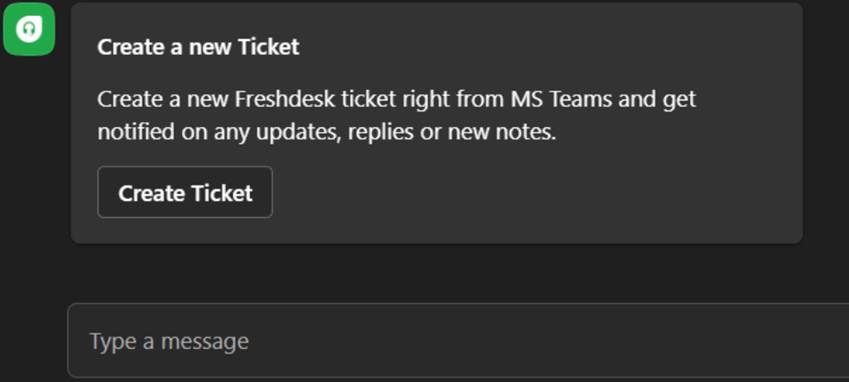
After clicking the Create Ticket option, a window (pop-up) will appear with the required fields to fill in the ticket information. At this stage, the employee must correctly enter the requested data, ensuring that the request is fully registered and properly directed to the responsible team.
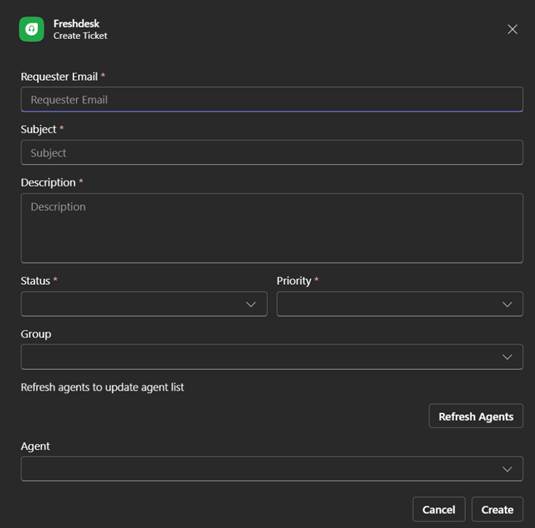
The fields available for completion include:
- Requester email: your email address
- Subject: brief description of the issue or request
- Description: detailed explanation of the request
- Status: for ticket creation, set as Open
- Priority: urgency level of the ticket (low, medium, high, or urgent)
- Group: selection of the responsible team
- Agent: the agent who will receive the ticket
After filling in all required fields, simply click Create to complete the ticket creation. From that moment on, the request will be registered in Freshdesk and assigned to the responsible team and agent.
4. Interaction with Received Tickets
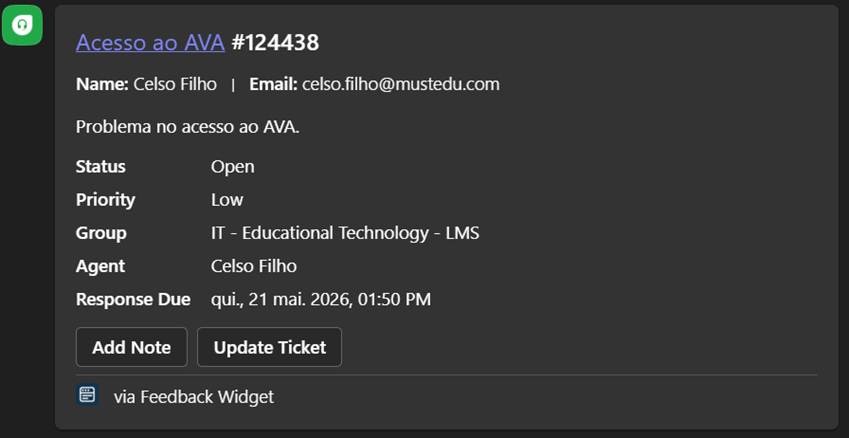
After a ticket is created and assigned, the responsible employee will receive a notification directly in Microsoft Teams, informing that a new request has been assigned. In addition to the notification, the Freshdesk chat will display the message related to the received ticket, allowing direct access to the request.
In the message sent by Freshdesk, in addition to the information provided by the requester, the ticket ID and the resolution deadline (SLA) will also be available, allowing the employee to track the urgency level and the available response time.
From this message, the employee can perform the main support actions, such as replying to the ticket directly through Teams, forwarding it to another department when necessary, and recording notes for organization and tracking purposes. These functionalities allow the entire handling process to be carried out in a centralized way, without the need to access the Freshdesk portal.
5. Responding to Tickets via Microsoft Teams
To respond to a ticket directly through Microsoft Teams, the employee must use the “Update Ticket” option available in the message sent by Freshdesk in the chat.
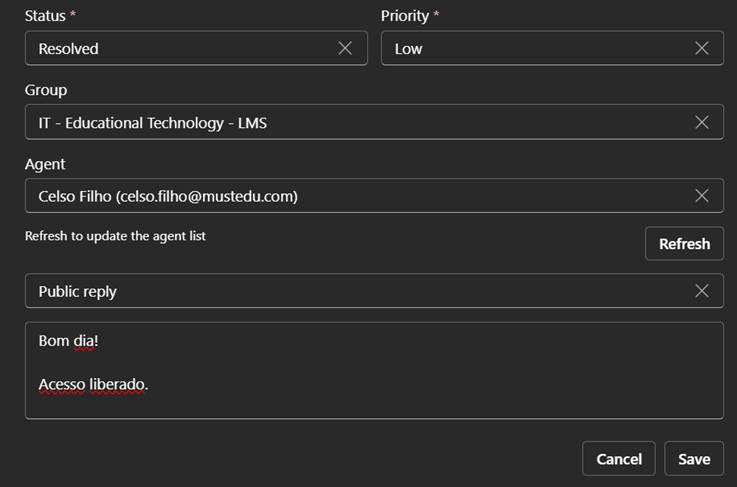
By clicking this option, a window (pop-up) will appear with the main ticket information, including the ticket ID, the request title (with direct access to Freshdesk), the current status, and the available update fields.
To reply to the ticket, simply use the message box available in the pop-up and enter the response according to the request. After sending the reply, it is important to update the ticket status, changing it to Resolved when the request has been properly addressed.
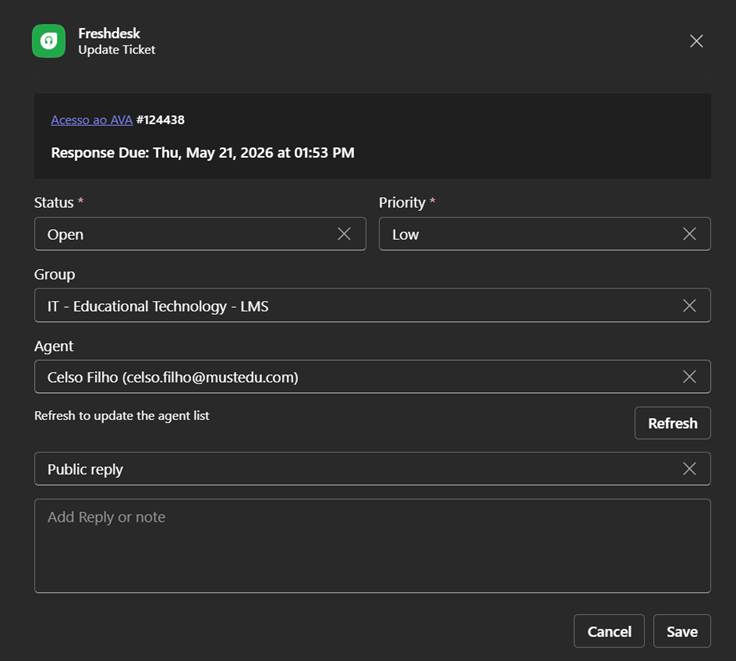
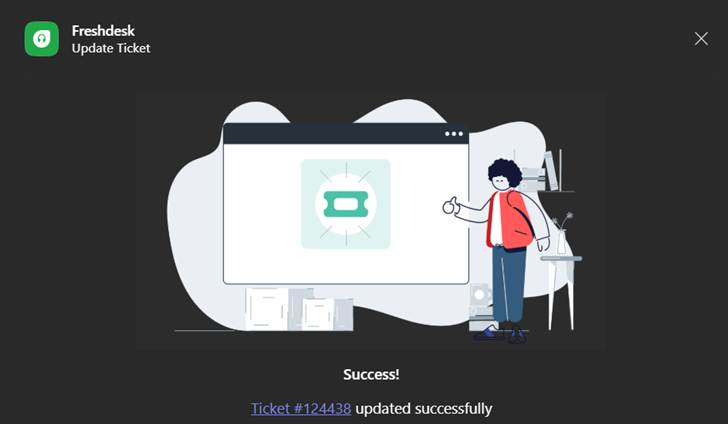
After clicking Save, a confirmation message will be displayed indicating that the ticket has been successfully updated. This confirms that the response has been properly recorded in the system.
Additionally, in the Freshdesk portal, the requester will be able to view the response along with the updated ticket status, which will appear as resolved, according to the action taken by the employee.

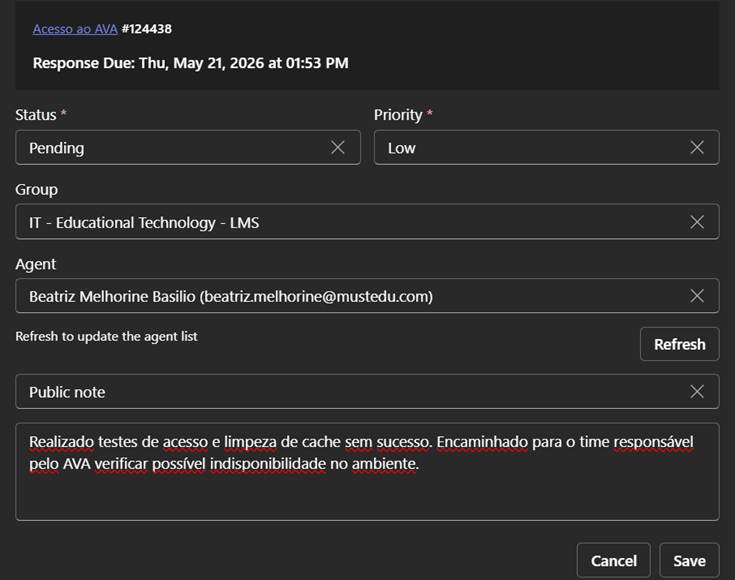
In addition to the response option (Public Reply), the Public Note option is also available.
Public Reply is used to send responses directly to the requester, being clearly displayed in the ticket history for the user to follow up. On the other hand, Public Note can be used to record additional information within the ticket, such as performed tests, request context, or service details.

6. Private Notes
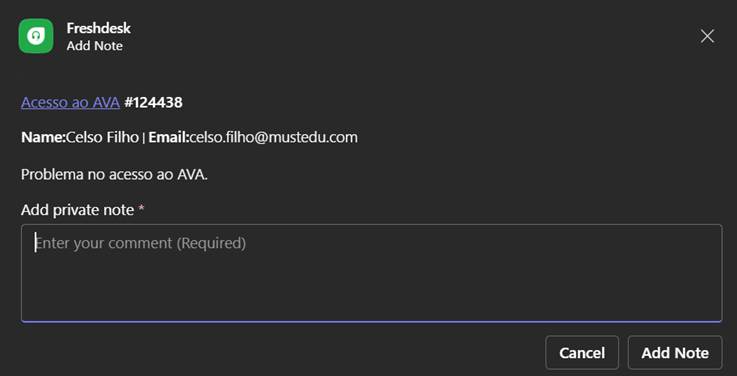
In addition to the available response options, Freshdesk also provides the Private Note feature, which allows the recording of additional information within the ticket.
However, in the current integration with Microsoft Teams, this functionality has a limitation: when using the private note option, it is not possible to direct the message to another agent or team, as the interaction is always recorded within the context of the ticket associated with the requester.
As a result, this option has limited usability within Teams and does not fulfill the purpose of internal communication between collaborators. Its use should therefore be handled with caution.
7. Considerations for using Freshdesk in Microsoft Teams
When using Freshdesk integrated with Microsoft Teams, it is important to consider certain system behaviors that may impact daily operations.
For example, when a ticket is created, it does not automatically appear in the Freshdesk chat within Teams for tracking purposes. Therefore, full monitoring of tickets should be performed directly through the Freshdesk portal to ensure proper visibility and control.
Another important point is that, during ticket creation, it is possible to manually enter the requester’s email (requester email). For this reason, it is essential to always validate that the address is correct, avoiding inconsistencies in ticket routing.
Additionally, when responding to a ticket through Teams, the agent’s signature is not automatically included, requiring the agent to manually add it to the message.
Finally, there is currently no support for attaching files directly through the Teams workflow. If attachments are required, it is recommended to perform the interaction directly through the Freshdesk portal.
8. General Best Practices
To ensure efficient, organized service aligned with institutional standards, it is important for employees to follow best practices when using Freshdesk through Microsoft Teams.
Whenever creating or responding to a ticket, ensure that the request is described clearly and objectively, including all relevant details to facilitate analysis and minimize the need for additional interactions.
Before opening a new ticket, it is recommended to check whether there is already a related request on the same topic, avoiding duplicate requests.
Whenever possible, validate the data entered in the ticket, such as the requester’s email, ensuring that the request is properly directed.
After resolving a ticket, it is important to review the status before finalizing it, making sure it is correctly set to Resolved, and, when necessary, complete additional information directly in Freshdesk to maintain consistency in records and reports.
Finally, use Microsoft Teams as a support tool to increase agility in handling tickets, but perform full tracking through Freshdesk whenever necessary, ensuring better control and visibility of demands.
Was this article helpful?
That’s Great!
Thank you for your feedback
Sorry! We couldn't be helpful
Thank you for your feedback
Feedback sent
We appreciate your effort and will try to fix the article